Wednesday 31 October 2012

How to Look like a princess

How to Look like a princess

You don't have to be born to a king and queen to act like a princess. You just have to adopt some of the mannerisms, dress like royalty and expect some of the entitlements given to the king's daughter. Get out your tiara, and start acting like the spoiled princess that you are.

Dressing up like a princess is every girl's dream and wearing bright sparkly makeup is the biggest thrill of all. Applying princess makeup is easy and doesn't require any real skill.
The look will be one of illusion, playfulness and most important Magical!
In summer, the skirts are always the favorite clothes for the girls. The shirts, whether it is the short style, the long style or even the one-piece style, could always bring out the most charming look just like a ‘Princess’.
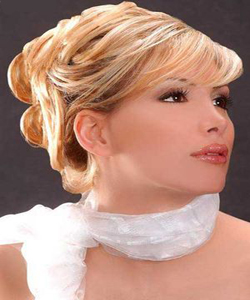
For your hair, look charming with those cute curls and some dazzling accessories!
Always finish with a veil – After all* YOU’RE THE PRINCESS!
For Your Face

For the princess look in you, start with a foundation for an even matched tone. Add some liquid shimmer; mix with a dab of your foundation for radiant, glam-perfect skin. Make sure to choose the shade matching your skin tone. Look Radiant! Always remember - Blend well to get well!
Don’t forget to give your cheeks that natural glowey look with soft pink blush!
 
For your Eyes

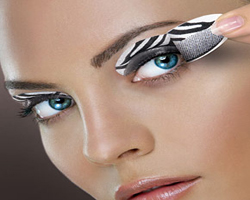
Princess look needs to be soft as well as shimmering! Take out all your shimmery pinks and purples which will be best suited for this look. Apply the eye shadow all over the eye lid and blend the outer crease area to avoid any harsh lines for that magical effect! End the look with an eye liner and Mascara and your eyes will speak out!
 
For Your Lips

Princess look will look incomplete without the pink lips and a gloss. Start with a lip balm which would help your lipstick to stay for longer time and then apply Lipstick with a lip brush for the natural look. Lip Liner is optional. Apply two coats of gloss for the luscious lips. Don’t forget you’re a Princess!
 
For Your Nails

This totally depends on you. You can color your nails with the dark pinks or can be really soft with peaches! Dip the brush inside the nail paint and wipe the excess nail polish off on the rim of the bottle to avoid applying too much polish on your nail. For a shinier look, apply a clear nail polish as a top coat.
 
Be the princess of your own world and One day you can actually run this world!

Tuesday 30 October 2012

How to apply nail polish

How to apply nail polish

Are you one of those women who believe that air vents in cars were put there to dry your nail polish? Have you ever sat in your car, engine running and stomach churning, applying nail polish with shaky hands?

Always apply your nail polish a couple of days beforehand, or whenever you have plenty of time to relax and get it perfect. If you then have to repeat the procedure or touch up any chips, you won’t need more than a couple of minutes. It’s better to leave your nails bare than to apply nail polish scrappily.

Don’t forget - You have to steal the show ;)

Start with a base coat of a transparent colour, this will harden your nails and ensure your nail color lasts longer.

Now start applying your color nail polish, apply it in three strokes, starting with a central downward stroke.

Follow with a stroke on either side.

If the polish smudges, use an ear bud dipped in some nail polish remover and carefully wipe away. Neatly clean out those edges.

Repeat the coat after the first one has partially dried.

Finish with a top coat which acts as a sealer and protector.

Ideally, you should leave your nails to dry for about half an hour. Use a hairdryer if you would like to speed up the process.

We love Maybelline New York Colorama glossy nail color in fun shades. Don’t have the patience to wait for your nail color to dry?

Try the Express Finish nail Color from Maybelline New York from wet to set in just 40 seconds flat!

How to remove makeup

How to remove makeup

Avoid leaving makeup on through the night - It can clog pores, especially if it is thick makeup or there is a lot on. It is the key to keeping skin looking gorgeous, especially. However, it can be tricky to make sure all of it is gone.
Remove any eye makeup

Use a gentle makeup remover just for eye makeup. Regular makeup remover can irritate the eyes. Make sure you get most off, if not all, of any eyeliner and mascara you had on, as well as some eye shadow.

Steam your pores
Drape a towel over your head and hold it over a sink of hot, steaming water. This opens your pores and is easier for cleansing.
Remove your lip color
Apply a small dab of makeup remover to your lips, and gently rub it in with cotton.
For your eyes

For a perfect eye shape, use a small brush to blend a medium tone color from just below the brow arch downwards in a semi-circle motion. Line your eyelids with a pencil and blend a darker shade into the crease and outer corner. Shadow application should be from inner to outer corners. Complete your glam look with ultra dramatic lashes. Sweep some mascara across the lashes to complete the glam look. Always apply mascara in a zigzag motion, this helps in avoiding clumps.

Use a gentle face wash

Most of your makeup should come off on this stage. Be sure the face wash is gentle and you don't scrub harshly. Your skin has been covered in makeup all day and it needs to breath!
Remove any eye makeup that ran while you washed your face

It's pretty common to see a bit of mascara or eyeliner under your eyes, and very easy to remove with a dampened cotton swab.
Close your pores with a splash of cool water

Rub in some moisturizer to soothe your skin.
Pat your face dry with a towel and rub in a light moisturizer

The rigor of the removal of makeup can dry out your skin in irritation. Soothe this with a light moisturizer.

How to Apply Mascara

How to Apply Mascara

 
Mascara is a very important product while applying eye makeup. For some it is the last step, and sometimes the most important. Mascara often makes eyes look much deeper and more defined; completing the look you may be striving for.
Position yourself comfortably in front of a mirror. Lean your dominant elbow on a firm surface. With a steady hand, place the mascara wand at the roots of your eyelashes.
Sweep brush upwards from root to tip to plump individual lashes and achieve dramatic volume. Continue building lashes until you reach your desired look. Do not let it dry between coats.
Repeat across your eyelashes, making sure to get every lash.
Hold the mascara wand vertical. Lightly run it along your lower eyelashes to add slight color to them.
Remove any mascara smudges. Place a cotton bud on the top of the smudge, and gently rotate in place until it comes off. User your finger to blend your eye shadow back in.

Blush Tips

Blush Tips

How and where you apply your Blush is determined by the shape of your face.
A ROUND FACE is almost as wide as it its long, with the greatest width at the cheek. To slenderize, apply your blush in a sideways V on your cheekbones and blend up. To add an illusion of length apply a bit of blush to your chin and blend well.
A SQUARE FACE has a squared forehead about the same width as the cheekbones and jawline. The squared jaw is the prominent feature. Beginning at the center of the eyes applies your blush on the cheekbones. Blend toward your temples and apply a dab to your forehead and chin to soften the square angle of the face.
A RECTANGULAR FACE is an elongated square shape. The forehead is about the same width as the cheekbones and jaw line. Apply blush on cheekbones below the outer corners of the eyes and blend well. Be sure the blush never extends lower than the tip of the nose.
AN OVAL FACE is said to be the ideal face. The forehead is wider than the chin. The cheekbones are dominant with the face tapering from the cheeks to a narrow oval chin. Use your fingertips to locate the most prominent part of your cheekbone to apply blush and blend towards your temples to highlight your cheekbones.
A TRIANGULAR FACE has a wide forehead and high cheekbones. The triangular face tapers to a narrow chin. Blush should be applied in a sideways V on the cheekbones. Blend up from your cheekbones to your temple and then extend the blush over your brow a bit toward the center of your forehead. This will help to balance the width of your forehead with the rest of your face.

How to apply foundation

How to apply foundation


Select a foundation that is appropriate to your skin type and the coverage you wish to achieve. The color should match your skin, disappearing when blended well. For a natural look your foundation must match your skin tone.

Place a small amount of foundation on the back of one hand. Dip your makeup sponge or your middle finger into it. Spread foundation on your hands and pat it on your face, then smooth out with a sponge.

Apply to the center of your face: cheeks, forehead, and chin.
Be extra careful in the area around your eyes where the skin is super thin.
Don't forget to apply foundation on your eyelids, as well.

Blend out to your hair and jaw line until the foundation vanishes. Pay special attention to blending around the nose, mouth and jaw line.
Always test foundations along your jaw line. The best color will disappear into your skin.

After you apply foundation go near a window to make sure it looks natural.
Natural light is the ultimate test!

Look like a Super Model

Look like a Super Model

When you pick up a glossy magazine with a supermodel on its cover; the first impression you get, is that of a classic figure model, who seems to have the perfect body, with smooth sun kissed skin, and flawless makeup. Although they do have a behind-the-scenes glam squad to keep them looking fabulous at all times, with little effort you can also re-create the same look for yourself!
1)
Supermodels are never caught off guard, with unkempt hair, a shiny face, or unpolished lips. Keep a bag of tricks ready at all times, with a small emergency kit with your favourite lip gloss, face wash, hair brush, pressed powder compact, oil blotting paper, mascara, kaajal pencil and safety pins.
2)
Green tea and its benefits are far sensationalized for us all to know. However, green tea also serves as the natural ingredient secret for a healthier life. Green tea fires up your metabolism to help intensify levels of fat oxidation and the rate at which your body burns calories. Supermodels have long known about the waistline-slimming effects of green tea.
3)
Always avoid exposing your skin to the sun between 12-4 p.m. Use sunscreen at all times!
4)
Accessorize all you can. For that very elegant and unique evening look, rely on a catchy bag, stunning shoes, fabulous belt, outstanding scarf, or a spectacular jewellery piece to compliment your outfit.
5)
A few make up tweaks here and there can help alter your entire look. For instance, if you are wearing smokey eye makeup, a little blue, gold or silver pencil on the inner eye corners will open up the area.
 
1)
Dressing up for any occasion can lead to a memorable personality impression. So look overdone, instead of underdone for every occasion, by making dressing up a daily grooming ritual. Team up your favourite make up, with some wardrobe essentials to create a charming statement.
2)
Also while you’re at it, don’t forget to smell good!

Get a quick makeup fix

Get a quick makeup fix

When you have very little or no time to look presentable, then girl oh girl you have got to be on your toes to get your act together, because in the real world, that's how we do it!
Since you are not born with celebrity genes, or bank balances looking your best at all times can take a toll on you. All you need is a quick makeup fix every now and then to keep you looking your best all day long.
Mirror, mirror on the wall, who's the fairest of them all? So here are a few quick fix tips to pep up your jaded complexion in a matter of minutes:
1)
If your eyes are you best feature, then that's where you should draw the attention! Do your eyes, because people will notice them. Sometimes a stroke of kajal, a dab of pressed powder under the eye to hide those blemishes and dark circles, and a dash of mascara can add that much needed sparkle to your eyes.
We
Colossal Kajal, The Colossal Volum' Express®
ream Matte™ Mousse Foundation
2)
A colored eye liner pencil when swished on to your eye lids, or the inner corner of the eyes, gives you that splash of color, along with making your eyes look more defined.
We
Vivid And Smooth Eye Liner Pencils
3)
To add color to your face you can add a dash of peachy pink cream blush on. The blusher will add that glow to your cheeks, making you look oh so fresh and ready to take on the world.
We
Dream Mousse™ Blus
4)
To accentuate your cheekbones, you can apply a darker shade of blusher, to accentuate that lovely jawline.
5)
Bronzer, when applied to the side of your nose, can give definition and sharpness to the shape of your nose.
6)
Before wearing your favourite tinted lip balm, lipstick or lip gloss; make sure that you dab a little bit of concealer/ foundation on to your lips, for that lip shade to stay on, and last you for a longer period of time.
W
Fruity Jelly Lip Gloss, Lip Smooth Color Bloom
Lip B
7)
For oily and combination skin you can carry a pressed powder or an oil blotting paper to wipe of the oil and dirt from your skin.
8)
In case your nail color is uneven or chipped, then painting those nails is a very good idea. Always carry a mini cotton roll, a mini nail polish remover and your favorite nail paint in your bag at all times.
W
 
9)
If need be, then you might have to remove your make up and re touch it again. So don't forget to carry a tiny mirror, and a makeup remover or makeup wipes in your bag. This will ensure that you can retouch your make up whenever required.

How to wear Professional Makeup

How to wear Professional Makeup

Here’s something to ease up all your makeup woes...

If you're used to experimenting with makeup, but have never applied it professionally before; then girl-oh-girl you need to gear up, because makeup for partying and clubbing, is different from professional makeup!
If you want to be taken seriously in the workplace, then you have to make it a point to enhance your beautiful features. As long as you keep this in mind, the rest of it should fall into place as you are on your way to create your own new look.
 
Step 1
Dot and blend an oil-free moisturizer all over your face. This will soften your skin and get rid of any dry patches without breaking your makeup down. After about 5 minutes, press a facial tissue all over your skin to absorb any excess moisturizer. This will help your makeup stay on smoothly and give it a more flawless finish.

Step 2
Apply foundation that matches your skin tone exactly and has the texture that complements your skin type. Use a liquid foundation such as the Dream Matte Mousse Foundation if your skin is on the drier side; and a powder foundation such as the White Stay UV Compact Powder if your skin is oily. Make sure that your foundation can give you the coverage you need. If you have good skin, light coverage is sufficient. If you have a few blemishes or some scarring from acne, try an intensive coverage formula. If you are uncertain, stick with medium coverage. Blend any lines or edges in your foundation with a makeup wedge for skin that appears naturally flawless. Even if you choose not to use much color on your face, a fresh-looking complexion will considerably improve your appearance.
Step 3
Dab a little bit of the Dream Matte Mousse Foundation under your eyes and on the inner corners of your eyes by the bridge of your nose. The foundation will conceal dark circles and brighten up your eye area and make you seem more awake without giving you the raccoon look that you will get from using a very light shade.
Step 4
Fill your eyebrows in with a brow pencil or a stiff angled brush dipped in brow powder to bring out the shape of your brows. Your brows frame your eyes and the rest of your face, so it is important that they are clean and defined if you want to look polished. Groom them on a regular basis by tweezing strays that grow outside of your brow line and by trimming hairs that extend past the brow line.
Step 5
Smoothen a little bit of moisturizer on from lash line to brow bone. After it absorbs into your skin, apply an eye shadow base such as the Dream Matte Mousse Foundation, also from lash line to brow bone. This creates a bare canvas that will help your eye shadows blend effortlessly and appear more vivid against your skin.
Step 6
Stipple a mid-tone matte eye shadow such as the Diamond Glow Eeye Shadow Quads on from lash line to just slightly past the crease using an eye shadow brush with a flat head. Stick with browns, grays, peaches and other soft or neutral hues to avoid detracting attention from your features to your makeup, as would happen if you used vibrant and bold shades. Blend the edges of your eye shadow application so there are no harsh or evident lines in your eye makeup. Blend a flesh tone eye shadow on your brow bones under your arches to lift your brows and subtly highlight your eyes.
Step 7
Bring out the shape of your eyes with a creamy eyeliner pencil such as the Vivid and Smooth Eye Liner Pencils, worked into your top lash lines. Use black if you have dark coloring or want more definition, and dark brown if you have lighter coloring. If you are used to having color along your bottom lash lines, you may work some color in here as well, but keep your hand light to avoid pulling your eyes down with too much darkness. Curl your eyelashes and apply black mascara such as the Colossal Volume Express Mascara on only your top lashes. Dislodge any clumps with the mascara wand as you go along. Use a waterproof formula to protect against smudging if this is one of your issues with eye makeup.
Step 8
Give yourself a flattering flush with a matching blush and lip color from the Color Sensational Range of Lip Colors, which you can get from a two-in-one cheek and lip stain. Find one that is just slightly more vibrant than your natural coloring. Use a peach-hued blush on the apples of your cheeks, if you have warm undertones in your skin and a pinkish one if your skin has cool undertones. On your lips, blend the color from the center outwards, topping with a clear lip gloss if desired.

How to Apply Eye Liner

How to Apply Eye Liner

Eye Liners are a cult favorite for a very good reason; they work great for your eyes! Without the application of an eye liner, your eyes may seem undefined. Ladies don’t we all agree to the fact that Eye Liners are a crucial part of your Eye Makeup, because without a stroke of eye liner, our look is incomplete!

It is one thing to learn how to wear an eye liner, and it is another; to know how to wear flawless eye liner! The secret to wearing the perfect stroke of eye liner is rather simple; learn how to identify the product and style that truly works for you.
Step 1: Begin with Fresh Clean Skin

Always ensure that your skin is clean before you begin your eye makeup. Use a nice face wash or face wipe to clean the area around your eyes of any dirt, makeup or impurities. Dirt, grime, oils and leftover make-up from the day before all contribute to today's make-up fading rather quickly. Be cautious of any oil-based products. These might be good for the delicate skin on your eyelids, but detrimental to how long your eyeliner and the rest of your eye make-up lasts.

Step 2: Eye Makeup Base

Always apply an eye makeup base. You can use a BB cream. Try the Maybelline New York Clear Glow BB cream for instantly flawless hydrated skin. The base or primer is applied evenly across your eye lids. This helps your make-up stay put much longer than usual, or perhaps even the whole day.

Step 3: Get the Perfect Eye Liner Consistency


Experiment with various eye liner consistencies until you get the desired result. You can choose from a pencil eye liner and a gel eye liner, whichever formula works best for you. The tools that you use for the eye liner application makes a difference in how your finished result looks and holds throughout the day. Always remember to have a small angled brush and cotton swab handy if need be.

Step 4: Smudge into your Lash Lines


Wear a kajal and smudge it into your lash line. If the line is not perfect, don't fret--that's what the cotton swabs are for. Use these to smudge your eyeliner a little bit more, thus creating a softer line. You now have a mild smoky eye makeup effect. The choice is yours whether to keep your line defined or not.

Step 5: Use an angled brush for easy application


Use the angled brush for precision when you apply the gel eyeliner. This can be worn either as a clean line or softly smudged as with the pencil.

Step 6: Get the Classic Look

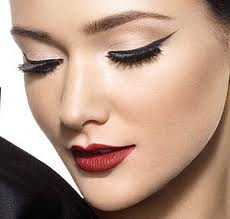
Line your upper lash line with liquid eyeliner for a look that is not only classic--it has literal staying power. Liquid eyeliner is especially ideal if your eyelids have no crease so that any eyeliner you wear other than liquid immediately disappears or smudges off. You can keep the line thin, or you can add some drama by extending the ends slightly into little wings. For this look, you can choose to leave your lower lash line bare. If you want a bit of balance between top and bottom lash lines, simply define lower lower lash line with a kajal that is softer in appearance.

Step 7: Use Water if necessary for Easy Application

Sometimes using water makes the eye liner application easier by giving it an even distribution. Wet the tip of your angled brush with clean water. Shake off excess. Dip into a tiny amount of the pigment of your choice before lining your eyes. Adjust the amount of water and pigment accordingly to perfect the appearance of your eyeliner. Let dry before blinking unnecessarily. This step is also applicable to powder eye shadows that you want to wear in the more vivid form of eyeliner.

Step 8: Finally don’t forget to make a statement with your Eye Liner

To finish off your look don’t forget to apply an eye liner that can make a statement. Make sure that your under-eye area is smudge-free after makeup application. Blending your everyday foundation into this region and topping it with translucent powder is an excellent way to keep makeup from seeping into under-eye oils. Throughout the day, periodically and discreetly check your make-up so that you can clean off any eye makeup that has migrated underneath your eyes.

Monday 29 October 2012

Makeup Tools 101: A Beginner's Guide

Makeup Tools 101: A Beginner's Guide

Girlfriend, I know your makeup bag is bursting with, well, makeup, but to get the most out of your cosmetics collection, you need the right tools for the job. Take your makeup application to the next level. Behold: Makeup Tools 101.

Makeup Tools

Remember using those tiny sponge applicators with play makeup when you were a kid? It's time to ditch those wee makeup brushes and wands that come packaged with compacts and eyeshadow palettes. Sure, they'll work in a pinch, like when you're running late for work or need a quick pre-date touch-up, but to get the most out of her makeup collection, a girl really needs the right tools for the job.

Brushes

To create a work of art, whether on canvas or your eye crease, artists will often reach for a brush. Specialized makeup brushes exist to help us apply and blend colors to create different makeup looks. When it comes to makeup brushes, hoard them like pirate treasure! Buy as many different brushes as you can comfortably afford. You'll use your brushes every day, and you won't regret having a variety from which to choose.
Makeup brush design varies across brands and according to function. Brush heads may be made from natural fibers like squirrel (yes, squirrel), goat, sable, or horse hair, while others are made from synthetic fibers. Don't be afraid to experiment with a variety of brushes made from different fibers. There's no better way to find your ideal brush, but be aware that some people are allergic to certain animal hairs. Try to use just a single new brush or beauty product at a time, and limit its use initially. That way, if your skin does react, you'll know which product to blame.

Face Brushes

We use 'em to apply foundation, concealer, powders and blush.

Foundation Brush: Used to apply foundation to the face and typically made from synthetic fibers. Most foundation brushes have a small, rounded brush head shaped like a tiny spatula.

Concealer Brush: Concealer brushes look like mini foundation brushes. Being smaller than foundation brushes makes them better suited for covering blemishes or for applying liquid concealers in hard to reach places like the corners of the eyes.

Powder Brush: With a large, fluffy brush heads and soft bristles, powder brushes are ideal for applying loose powder to the face.

Blush Brush: They resemble smallish powder brushes with either a sloped or rounded tip. Great for applying blush or bronzer to cheeks.

Eye Brushes

There are lots of eye brushes to choose from, which is a blessing for brush hoarders like me (I own over 30, yikes) but a curse for makeup newbies. Start your collection with the essentials.

Eyebrow Brush: Eyebrow brushes have firm, angled brush heads like the tip of a marker. Use them to apply powders, creams or waxes to brows.

Eyeshadow Brush: Not as stiff as an eyebrow brush, eyeshadow brushes have square heads used to evenly apply both powder and cream shadows to eyelids. I reach for this brush so often that I might as well have it permanently attached to my hand! Expect to use these a lot.

Blending Brush: Like the name implies, blending brushes are used to blend different colored products and to wipe out harsh lines. They come in a variety of shapes and sizes. Not as firm as eyeshadow brush heads, the heads of blending brushes are usually tapered. This will be your second staple brush (behind your eyeshadow brush).

Concealer Brush: Used to cover blemishes and imperfections on the face, concealer brushes have a thin, pointed tip, much like a fine-tipped paintbrush.

Crease Brush: Fluffy and soft, crease brush heads come in several different shapes, from thin and tapered to round and fluffy. The shape you choose will depend more on personal preference than anything else. Look for a brush head that feels soft against your eyelid and fits into the hollow of your eye.

Lip Brushes

At one time or another, most of us have applied lipstick straight from the tube. As much as I love my brushes, I have to confess: I do this all the time! Let's face it, applying lipstick straight from the tube is much easier than reaching for a lip brush, and sometimes you just don't have the time. However, when you feel like rocking a deep, dark scarlet or a bright matte fuschia, a lip brush is the only way to go. It provides more control and precise lipstick application than a tube. Like concealer brushes, lip brushes have a firm, thin tip. For on-the-go lipstick application, look for a covered lip brush, which comes with a cover to protect the brush head while you're traveling.

Choosing the Right Brush

Brushes range from budget-friendly (less then $10) to uber-expensive ($250, ouch!). Save for 'em and cough up the dough, girlfriend, because they'll get plenty of use. Buy the best brushes you can afford. MAC Cosmetics brushes have a good reputation, but shop around. Sonia Kashuk, sold at Target stores, is another good brush brand for the money.

How to Clean Your Brushes

Regularly cleaning makeup brushes extends their useful life. Some makeup lines sell liquid brush cleaning solutions, but baby shampoo and water also work well. Antibacterial wipes provide a quick way to clean brush heads in the car or wherever water would make a mess. After cleaning your brushes, reshape the brush heads with your fingers and line them up on the edge of a shelf or sink to dry.

Short- Versus Long-Handled Brushes?

Brush handles come in different lengths and weights, and which one you choose depends on your personal preference. Small hands might prefer short brush handles.

How to Store Your Brushes

For cheap, easy brush storage at home, stand them up in a glass (brush heads up). When you're on the road, use a brush roll, which is a folding bag with slots for each brush. It rolls up like a sleeping bag.

Other AccessoriesDon’t let your makeup brushes get lonely! There are a few other tools you might consider adding to your makeup arsenal.

Eyelash Curlers: Handheld crimpers used to curl the upper eyelashes. How do you know a good eyelash curler from a bad one? Well, the best eyelash curlers won’t pinch as they curl your lashes. Beauty doesn’t have to hurt. Cosmetics company Shu Uemura makes what most consider the industry standard eyelash curler, but Shiseido’s curler gets an admirable mention. Both are top notch. Always curl your lashes when they’re dry and clean. Curling lashes with mascara on them may leave you with broken lashes!
Round and Wedge Sponges: Round and wedge sponges are handy for blending and smoothing out makeup lines on the face and around the eyes.  Q-tips: Useful little buggers. Use Q-tips to remove excess makeup around the eyes or lips or, in pinch, to apply eye shadow.
Fingers: Even with a huge collection of brushes, you’ll still sometimes use your fingers to apply makeup. They’re just that handy (excuse the pun). Fingers excel at applying products like cream blushes and stick foundations that soften when slightly warmed.

Brow Comb: Used to style eyebrows or to brush out excess eyebrow powder.

I hope you enjoyed this beginner’s look at makeup tools. Don’t be afraid, girl. The brush is your friend. Now, go forth and be beautiful!

20 Beauty Secrets Every Teen Should Know

20 Beauty Secrets Every Teen Should Know

There's nothing worse than getting advice from older people, we know, we know, but the truth is some advice is worth taking and keeping, especially when it comes to fun beauty tips. We've been reading fashion magazines and testing beauty products for years. In this time, we've read 1000s of beauty tips, tried 1000s of products, but only a few are worth keeping around. So, here we share with you the 20 things we wish we knew when we were teenagers.

1. Skip the foundation If you have acne the first thing you want to do is slather on the thick foundation. Don't. Foundation is for women over 35. Not only will it cover up your natural beauty, but foundation on a teenager looks anything but natural. Instead, cover up blemishes with concealer, then follow with a powder or tinted mosturizer. Tinted moisturizers tend to be lighter than heavy foundations.

2. You pat concealer in, you never rub it in We know this from watching the Tyra Banks show. When applying concealer, put a bit on the pad of your middle finger and pat it in. Never rub. Got acne? Pat the concealer on top of it.

3. Play up your lips or your eyes, never both If you are wearing heavy eye makeup, go for nude lips with just a bit of gloss. Prefer the drama of dark lipstick? Keep face light (stay away from heavy blush) and wear only mascara on your eyes and a light eyeshadow. Don't heavily line your eyes. Play up both and you'll look like a clown.

And never, ever line lips in a darker color than your gloss or lipstick.

4. Less is more Ever notice how some of your friends look best with no makeup at all? No matter your age, too much makeup makes you look worse. If you wear foundation, powder, blush, liner, mascara, eyeshadow, lip liner and gloss on an everyday basis, then you're overdoing it. Tone it down: All you really need is a great mascara, concealer for blemishes and gloss. Add a pop of blush in winter.

5. Natural hair is always hot If you have super dark hair, lighten your look by going a shade darker or getting lighter highlights. Blonde? Try highlights, especially framing the face. We see too many teens lightening their hair several shades and the look can be super-tacky, not super-fabulous. The trick is to let people assume you were born with sun-kissed hair, not that you gave yourself a bad dye job from a bottle.

6. Vaseline is your best friend Vaseline is a great, cheap eye makeup remover. It's also great for fixing chapped, scaly lips. Slather on a bunch of Vaseline, then use a toothbrush to massage lips. Wipe the excess off on a tissue. Your lips will be smooth and soft.

7. You can never go wrong with layers Long layers are great for any hair type: Super curly, straight or wavy. It makes thin hair appear thicker, curly hair appear manageable and wavy hair appear just-got-back-from-the-beach sexy. Just make sure you don't get too many layers cut in. Too many short layers is dated.

8. Acne? Get thee to a dermatologist, stat Biggest mistake people with acne make? Not going to a dermatologist. Forget those $150 jeans you covet. Getting rid of those pimples will be the best investment you'll ever make. And the only guaranteed way to do it is with a dermatologist.

9. Spend money on key beauty products Not sure what to splurge on and what to save on? I give you the scoop in this article. See if you should splurge or save on cleansers, mascara, concealer and more.

10. Buying foundation or lipstick? Test it first There are some beauty products you simply must try out at a department store or Sephora before you buy. These include: Foundation, lipstick, blush and powder.
Buy these products in a grocery store and you'll be lucky if you picked the right color for your skin tone. What you can get away with without testing: Mascara, eye liner, most basic eye shadows and lip gloss.

11. When can you skip sunscreen ? Never Here's a trick we wish we knew: The first beauty product you should apply every day is sunscreen, even if it's cloudy or rainy outside. Why? Good habits start young and if you use sunscreen now, you'll have gorgeous skin when you're 50, 60, 70. Remember, the sun's UV rays can penetrate clouds and car windows.

12. Wrapping hair around the barrel creates waves There's nothing cooler than long, layered waves. To get them, wind hair AROUND the barrel of a large curling iron. Reverse direction for each 2-inch section (wind up for one, down for another).

13. Self-tanner will always stink Unfortunately, even the best ones smell. Your best bet is to apply self-tanner a good 24 hours before an important event and take a shower (don't loofah) to wash off any smell. For really big events like a dance or wedding, consider a professional spray tan. These are pricey and don't last long, so make sure to do it a day before the big event.

14. Don't let nails go Not into manicures and pedicures? No worries. Just make sure to keep nails clean and the same length. If you do want to paint them, don't keep the polish on until half of it's chipped away. Also, there's nothing worse than too-long toenails. Keep nails clipped between pedicures! People tend to judge others by the care they put into their hands and feet.

15. Don't line the inside of your eyes It will make your eyes appear smaller. Instead, line just at the lash line. Also, an obvious line doesn't look natural. Smudge the line just a bit.

16. Oily hair? Invest in a dry shampoo If you have blonde hair, sprinkling a bit of baby powder on your roots and at your crown will soak up excess oils. If you have brown hair, you might be better off with a dry shampoo for your hair color.
17. Shave legs at the end of the shower Cut down on nicks and cuts by making shaving the very last step in your shower or bathing ritual. 

18. Know your best feature and play it up What feature do people comment on most? Play it up. If you're told you have Angelina Jolie lips, make sure to wear gloss and play with bold lipstick colors. If it's your eye color people love, find eyeshadow colors that complement them and make sure to wear mascara. Also, know what color shirts look best on you and go shopping.

19. Scrubs are great for dry skin If you have dry, itchy skin in winter, invest in a scrub and handmitts and scrub away in the bathtub. Make sure to slather on a thick moisturizer afterward. For dry, callousy feet, buy a pumice stone. They work better than any of the other wimpy options on the market.

20. Remember: Beauty is mostly internal Think about a girl you know who's overweight yet all the guys love her. Why? Because she's confident. If you aren't wearing makeup and your toes haven't been repainted in weeks, if you're happy and smiling you will still be 10 times prettier than the mopey cheerleader sitting next to you in class. Trust us (wink).

Sunday 28 October 2012

Natural Face Packs for Dry Skin

Natural Face Packs for Dry Skin

 Banana Face Pack for Dry Skin What you need:
    • 2 teaspoons of honey
    • little bit of ripe banana
    • a small bowl of mashed yogurt
    How to apply:
    "Apply the pack on your neck and face and leave for 15 minutes and then rinse it off.

    Avocado Face Pack for Dry Skin"
    Mash avocado in such a manner that you will get a creamy paste out of it. Apply the pack on your face for half an hour and then rinse it with lukewarm water. Then wash your face with cold water to close the facial pores.

    Butter Face Pack for Dry Skin
    Make a paste of little bit of butter and few drops of water. Apply this pack on the dry areas and leave it for half an hour. Then, rinse it with cold water.

    Cabbage Face Pack for Dry Skin
    Mash the cabbage leaves to get the cabbage juice out of it. Add 10 drops of honey and a small amount of yeast to the juice. You can apply this pack on your neck and face and then let it dry for 30 minutes. Wash the pack off with warm water but rinse it with cold water. Cabbage pack is quite effective among all the natural face packs for dry skin.

    Onion Face Pack for Dry Skin
    Onion pack is not very popular as many of us cannot tolerate its strong odor. But, onion is a perfect ingredient for the natural face packs for dry skin. Mix 2 teaspoons of onion extracts with honey. Apply the pack on your face. If you are yearning for a wrinkle free skin even at sixties, then, try out this pack.

    Wheat Flour Face Pack for Dry Skin
    Mix a small quantity of wheat flour with milk cream and rose water. Rub this pack on your skin to remove the dead cells. Rose water will soften and moisturize your dry skin. You can even try out the other conventional recipe for wheat flour face pack.
    You can make a wheat flour pack with 1 tablespoon of mayonnaise, 4 teaspoons of gram flour and 4 teaspoons of honey. Blend the ingredients and apply the pack on your face and other dry areas of your body. Leave the pack for 30 minutes. Let it dry and then massage it off.


    Warning: If you are allergic to any of these ingredients, do not use these natural face packs for dry skin

Beauty Make Up

Facial - Beauty Make Up


A facial is a procedure, involving a variety of skin treatments, including: steam, exfoliation, extraction, creams, lotions, facial masks, peels, and massage. It is normally performed in a beauty salon but it is also a common spa treatment.
To Get Rid Of Pimples Beauty Makeup - Facial Beauty Makeup

You Will Need:

1. Sandalwood
2. Red Sandalwood
3. Clove
4. Kasthuri Manjal
5. Oil
6. Water
7. Cucumber Slice
8. Eyecubes

How to Apply?

Take Sandalwood, Red sandalwood, Kasthuri Manjal and Clove. Make it in a form of powder, mix all powders with ordinary oil and Water. Now apply that mixture on your face and massage for 10-15 min (leaving your eyes). Rest for 10 minutes, after massage and then wipe it with soft clothes or cotton. After that, take a slice of cucumber and keep it in the ice cubes for a while. Place that icy cucumber on your face for 10 min and then wipeout your face and eyes. At last wash it with Chill water. Now you can feel some changes like soft, bright in your face. Apply this facial once in 3 days a week for better results.

Note:

The oil quantity should be less than the water and your mixture paste should not be so watery.

Things To Done To Get Dark Black Hair

You Will Need:

1. Aloe Vera
2. Hibiscus Flower
3. Normal Hair Oil
4. Normal Shampoo

How to Apply?

Take Aloe Vera Gel, Hibiscus Flower and mix all with normal hair oil. Apply before taking hair wash and wait for at least 2 hours after applying. Now wash your hair with normal shampoo and wait for 5 hours to get awesome effect. Use this twice a week for better results result and to get attractive dark black hair.

Home Remedies For Oily Skin

You Will Need:
1.One Egg White
2.Lemon Juice
3. Warm Water
How to Apply?

Make a homemade mask by adding one egg white and a tea spoon of lemon juice. Apply this mask on your face and rinse with warm water after 20 minutes. Now wash your face. Apply this twice a week for better result.

Get Rid Of Blackheads

You Will Need:
1.Honey
2.Cinnamon Powder
3. Warm Water
How to Apply?

Take a bowl and make a paste by adding 3 tablespoons of honey and 1 teaspoon of cinnamon powder. Apply this paste on the blackheads area before going to bed and wash it next morning with warm water. Repeating it for two to three weeks will remove your blackheads.

Manicure

You Will Need:
1. Acetone
2.Liquid soap or shampoo
3.Oil or cream
4.Warm water
5.Antiseptic lotion
6.Nail polish
7.Orange stick
8.Soft Towel

How to Do?

Remove the old polish then shape your nail with nail filer. Now dip and soak your hands in luke warm water with liquid soap or shampoo for some time. Then wash your hand with cold water and wipe with soft towel. Clean your nails using orange stick and cotton dipped in antiseptic lotion. Now apply some cream and push the cuticle back gently using cuticle pusher then massage your hands for five minutes. Now you can apply nail polish and allow drying.

Eye Makeup

How to Do Your Own Eye Make Up, the Right Way?


Ever wonder how the models on TV get their eyes to look so amazing? Do you wish that you could make your eyes look stunning in less then 15 minutes? Well, we have the steps and eye makeup tips to make your eyes look the best they have ever been!
Eye Makeup


Steps :
    1. Clean your eyes with a gentle makeup remover to get rid of any traces of eyeliner and mascara.

    2. Take an eyelash curler and squeeze for about 5-7 seconds.

    3. With your eye closed, draw a light line with an eyeliner on your top eyelid (don't worry if it isn't perfect, you can fix it later).

    4. Open your eye and line your bottom lid with eyeliner.

    5. Use waterproof mascara on the bottom and top lashes. Make sure that you add more mascara to the outer lashes for a more "flirty" look.

    6. If you have light-colored skin, take a tan-colored powder and sweep it on just above the eyeliner.

    7. Take a lighter tan-colored powder and sweep up to the area where your eye creases.

    8. Take a pale-colored powder and sweep up to your eyebrow. Use this same color and sweep under your eyes and in the corners (to get rid of dark circles and wrinkles).

    9. Blend the colors so that they transition nicely, and make sure your mascara isn't clumpy.

    10. Repeat on the other eye.
Tips :
    1. Make sure that your eyebrows are freshly plucked.

    2. These colors are for people with fair skin. You can use darker colors if you have darker skin.

    3. Less IS More.


Steps in Creating Smokey eyes


    Step 1:
    First, gently clean your eyelids using a damp paper towel.
    Step 2:
    Next, apply your concealer to the eyelid and cover the whole brow bone.
    Step 3:
    Now, select your color. Choose it on the bases of your skin tone, your eye color and the color of your dress you put on. Choose a medium and a dark of same color i.e. if you choose gray color, select medium gray and dark gray.
    Step 4:
    Using the eyeshadow brush, apply the medium shade over the entire eyelid and up to the brow bone.
    Step 5:
    Now, take the dark shade with the eyeshadow, Start at your lash line and blend with your base color upward (this gives you a Smokey effect). Blend extremely well. Note take only little color with your eyeshadow because it is dark color and removing it is too hard.
    Step 6:
    Now Eyeliner is a key makeup used for Smokey eyes. This should be applied above your upper lash line. Try to thicken the amount in the center of the line, while applying more thinly along the ends. This makes your eyes look bigger.
    Step 7:
    Curl your lashes and apply mascara. Your new look is complete.

Permanent Makeup

Permanent Makeup


Permanent make up is a tattoo like alternative to the daily rigors of cosmetic makeup applications. Similar to tattoos, permanent makeup involves placing pigmentation Permanent Makeup into the deeper layers of the skin resulting in the permanent appearance of fashionable eyebrows, eyeliner and even lipstick.
Most people concerns over whether to undergo permanent makeup procedures or not, because of the level of pain involved. The recent decade has brought about dramatic changes in the field of permanent makeup. A skilled permanent makeup technician should have all of the available skills, tools and anesthesia to provide the most successful and pain free experience to their customers.

Many people presume that an application of permanent eyeliner would be the most painful procedure but this is not the case. There are many topical and over the counter anesthetics available that are applied via a Q-tip and allowed to set for approximately ten to twenty minutes.

Potential permanent makeup customers should always ask their technicians what kind of anesthetics that they will be using. If an appropriate answer is not received a customer would be wise to pursue an alternative makeup technician.

Discomfort to the eyes will be drastically reduced as a result of topical and consumed anesthetics.

Permanent lip makeup is in fact the most painful sort of permanent makeup that can be applied.

There are ways to minimize the pain of lip pigmentation similar to those of eye treatments. More advanced pain reduction can be achieved if the procedure is obtained in a professional dentist office. Dentists will be able to apply local anesthetics similar to those received during dental work that will greatly reduce the painful sensations of the needles.

With permanent lip pigmentation all customers would be well advised to select a very experienced permanent makeup technician as a gentle touch is the best way to avoid too much pain from the procedure and the recovery.

Many women find ultimately that once they have pursued the procedure of permanent makeup the long term benefits far outweigh the costs and stresses of daily topical makeup application.

The directory permanent cosmetics offers listings of permanent cosmetic makeup professionals worldwide, there are also some useful resources at the dmoz directory category relating to permanent cosmetics.

Homemade Perfumes - II

Homemade Perfumes


Perfume is a mixture of aroma compounds that regularly comes from wine, food, fragrance oils and spices and fragrant vital oils. People can simply make different types of Homemade Perfumes at home in few minutes.

Homemade Perfumes Recipes:

1. Basic and effective Homemade Perfume Recipe

You will need:

Take one full cup of clean chopped of flower blossoms and one full cup of mineral water.

Method:

Place dirt free cheesecloth in a big bowl and the corners of cloth are hanging over big bowl. One can prefer flower blossoms like Lilac, Lavender, and Honeysuckle or Orange blossoms and take one full cup of selectable flower blossoms. And next pour mineral water on the flower blossoms.

Cover the entire the flowers by pouring water on them. Leave it for over night and see on the next morning, pull the cheesecloth from the bowl and squeeze it into a small airtight pot. Cool and store at a dry place. One can make use of this perfume for about one month from the time of manufactured.


2. Whispering Rain Perfume

You will need:
  • 3 full tablespoons of Ethyl Alcohol or Vodka
  • 10 drops of fragrance oil or bergamot essential oil
  • 2 full cups of distilled water
  • 5 drops of fragrance oil or sandalwood essential oil
  • 10 drops of cassis essential oil
Method:

Put all the above ingredients in an airtight container and mix well. And leave it for about 12-15 hours for settling it. One must store this perfume in a cool dry place. Shake well prior to using it.


3. Homemade Orient Nights Perfume

You will need:

  • 4-5 drops of musk essential oil
  • 2 full teaspoons of jojoba oil
  • 4 drops of Sandalwood essential oil
  • 3 drops of fragrance oil or frankincense essential oil
Methods:

Put in all oils in the airtight bottle and let it for settling for on 12-15 hours. One must store in a cool, dark and dry place. Remember that to shakes well before using it.


4. Falling Stars Perfume

You will need:
  • 3 tablespoons of Ethyl Alcohol or Vodka
  • 10 drops of Chamomile essential oil
  • 2 full cups of mineral water
  • 5 drops of lavender essential oil
  • 10-12 drops of Valerian essential oil
Method:

Mix up all oils with water in the airtight container and shake well softly. After this allow it for settling for on 15 hours. People must shake well before using this perfume. Take that and store it in a cool and dry place.


5. Amaze Perfume

You will need:
  • 3 tablespoons of Ethyl Alcohol or Vodka
  • 10 drops of cypress essential oil
  • 2 full cups of distilled water
  • 5 drops of hypericum perforatum essential oil
  • 10 drops of rosemary essential oil
Method:

Mix all oils with some quantity of distilled water and pour it into an airtight bottle or container. And let it for settling for on 12-15 hours. Prior to using this homemade perfume, shake well. Store it in a cool, dark and dry place.


6. Homemade Hungary Flower Water

You will need:
  • 2 oz or 50ml of Ethyl Alcohol
  • 12 dr Lemon Essential Oil
  • 5 dr Rose Essential Oil
  • 2 dr Sage Essential Oil
  • 30 dr Rosemary Essential Oil
  • 5 dr Neroil Essential Oil
  • 2 dr Mint Essential Oil
Method:

Mix all oils with Ethyl alcohol in a bottle. Let leave it for 10 hours. Shake well before using it and then store it in a cool dry place. One can use it for one month from the time of manufactured.

Homemade Deodorant

Homemade Deodorant Homemade Deodorant
Homemade deodorant will keep away from various sweat making bacteria and all dirty body smell. One must use deodorants to manage the growth of bacteria and smells. There are great numbers of deodorants from many reputed companies obtainable in the market. People can effortlessly make deodorants at home in a few minutes.

1.Stick Homemade Deodorant

You will need:
  • 2 ounces of baking soda
  • Vodka about one ounce
  • Beeswax- 8 ounces
  • Cornstarch-4 ounces
  • Liquid chlorophyll-1 ounce
  • Distilled water-about 2 ounces
  • 10-15 drops of rose, honeysuckle, coriander oil according to the choice
Procedure:

Not including chlorophyll and wax put all above ingredients in a big bowl and mix and stir well. And after that let it melt beeswax in a double boiler at low heat. Then, add chlorophyll and wax and blend it gently. At this moment leave it for cooling by before solid, mix necessary oils and liquid chlorophyll. And after this pour this combination into a mold and put down it for solid. Take away the prepared deodorants from mold and keep in dry chill place.


2. No-Sweat Tea - homemade deodorants

You will need:
  • One full teaspoon of dried hops
  • One full teaspoon of fresh rose petals
  • Stinging nettle, one teaspoon
  • Four full cups of hot water
  • Dried leaves of strawberry, one teaspoon
  • Dried leaves of sage, three full tablespoons
  • Fresh leaves of walnut-one full teaspoon
Procedure:

Take and Mix all the above ingredients and steep them for just about 60 minutes. Following this, strain the tea and take with honey.


3. Cream Deodorant

You will need:

  • Glycerin one full tablespoon
  • Cocoa butter-half ounce
  • Rosewater one full tablespoon
  • Beeswax-half ounce
Procedure:

Take the beeswax and cocoa butter in a big boiler and melt them fine. And then, add rosewater and glycerin later than removing from heat. After this, add few drops of necessary oils like eucalyptus, coriander, lemon, calendula, sage, lavender, thyme or rosemary. If cream is separated, mix the deodorants prior to using it.


4. Herbal Deodorant Powder

You will need:

  • Take one part of powder of white oak bark as an astringent
  • Take two parts of powder of sandalwood for anti-microbal and fragrance properties
  • Take one part of powder of lovage root
Procedure:

Take all the above powder in a food processor and mix together them well until all powders change into a fine powder. Transfer this powder into a dried out or clean iron skillet. Previous to using it pat bags on the feet and under arms.


5. Deodorizing Foot Bath:

You will need:

  • Take 5-6 tablespoon of Epson salts
  • White vinegar half cup
  • Warm water about one gallon
Procedure:

Mix all the above ingredients and Soak the dirty feet in the solution to stop sweat and bad smell.


6. Sage Deodorizing Foot Powder

You will need:

  • Sage essential oil-2 or 3 drops
  • Baking powder-One full tablespoon
Procedure:

Mix oil and baking powder in a bowl and then shake well for some time. And then leave it to dry for not many minutes.

Homemade Perfumes

Homemade Perfumes Homemade Perfume


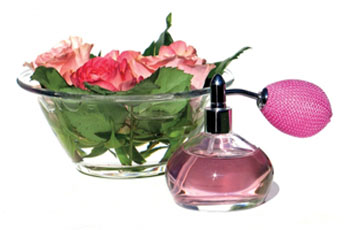
The Homemade Perfumes are easy to prepare with small ingredients which are available with us. And it reduces the money spending for costliest perfumes available in shops. Water, alcohol and essential oils are the three most common ingredients in making home made perfumes.

Here are some recipes that can be done at home

Basic Perfume Recipe

The basic Perfume is the simplest one to make in the home. The ingredients needed are water and the fresh chopped flowers. Take a cheese bowl put the chopped flowers pour the water into it. cover the bowl and keep it for full night. Now the perfume is ready for use. Some Lilac or Lavender can be used instead of using needed flavour flowers.

Suggestions for flowers are Lavender, Lilac, Orange Blossoms or even Honeysuckle. Anything that is highly fragrant works best for homemade perfumes.

Homemade Hungary Flower Water

Other flower which is more easy and give more smell is hungary flower .Now we see the preparation of the Hungary flower perfume which can easily prepared by in the home.

Take 2 oz Ethyl alcohol 50 ml with that mix the 30 drops of rosemary essential oil, 12 drops of lemon essential oil, 5 drops of rose essential oil,5 drops of neroil essential oil , 2 drops of sage essential oil, 2 drops of mint essential.store it in a bottle. Now the hungary perfume is ready.shake well before using the perfume.

Lavendar Water

In the same way to prepare the basic perfume you can prepare the Lavendar perfume.

Take 2 cups of Lavendar flowers in a flameproof container and pour 2 pints of boiling water add 2 tbl spoons of vodka and then stir well. Cover the leave to infuse for 48 hoursalso stir occasionally. Now strain the liquid in a non-metallic strainer and press the flowers against the sides to extract maximum fragrance. Stir in the alcohol and put it into the bottle. Now the Lavendar perfume is ready.

Homemade Shampoo

Homemade Shampoo Homemade Shampoo


Shampoo is a hair care product which is used for the removing the oils, dirt, skin particles, environmental pollution and other contaminant particles that gradually build up in hair. The goal is to remove the unwanted build-up without stripping out so much as to make hair unmanageable. When shampoo is combined with water, is a surfactant, which is cleaning the hair and scalp, can remove the natural oils which lubricate the hair shaft. Shampooing is frequently used by conditioners which increase the ease of combing and styling.and gives good look to the hair.

Drawbacks of shampoos:
  • Silicones is now commonly used in all Shampoos. These silicones are added to give the appearance of the hair to be more soft and shiny by coating the hair shaft. Basically it reflects the light and gives it a silky "feel", but silky glittering that you're feeling and seeing is not your hair.It is creating a obstacle so that your scalp can't breathe and your hair can't absorb the natural oils produced by the scalp. These natural oils are important if you desire true healthy and strong hair. It can also sometimes play a part in hair loss or excess falling of the hair.
  • Sodium lauryl sulfate is a detergent that contains group of synthetic, organic, liquid or water-soluble cleaning agents most frequently used in shampoos. sodium lauryl sulfate can be drying and harsh for the hair and cause eye irritation, allergic reactions, and hair loss.
  • Shampoo is like strong medicine and it can be only needs to be used twice a week to keep dandruff and itching under control.
So to avoid all the problems which are specified above we can prepare the shampoo in the home itself with ingredients of natural things which are easily get and not costly also.

Some of the ways to prepare the Homemade Shapoos:

Egg Shampoo

In a bowl, take one large egg separated. Beat egg white until foamy. Now blend the yolk followed by the castile soap. Wet hair with warm water. First massage half of the egg shampoo into scalp. Rinse well then massage remaining shampoo into scalp. Leave on hair about 1 min. Rinse thoroughly the hair with warm water.

Another Homemade Egg Shampoo

Take one egg and add one tsp of olive oil, lemon juice and one tsp of castile soap. along with that add some half cup of water or herbal tea. if possible add some drop of fragrant essential oil of your choice of flavors which you like. After that combine all the elements which is specified and whip until it get smooth. Now the shampoo is ready and you can rinse the hair with warm water after applying the shampoo thoroughly to the hair. You can use the remaining shampoo for next wash by keeping it in the refrigerator.

Herbal Homemade Shampoo

Add a quarter cup of your favourite tea which is strongly distilled.and add 8 oz of castile soap . Now stir this liquid over low heat until well blended.store it in a capped bottle.

Home-made shampoo for Dandruff Treatment

Take the herbs in the bowl and pour 2/3 cup of boiling water. Then allow to steep for 20 minutes by covering the bowl. After that pour it into the bottle an add 2/3 of cider vinegar and shake well. Then keep it in a cool dry place.

Now take a head bath using this shampoo and rinse the hair thoroughly. Massage little amount into the scalp.

Massage it into scalp with a small amount before going to the bed. Dandruff can be eliminate by this shampoo easily.

Homemade face pack

Homemade face pack Homemade Face Pack


Facial At Home
Before applying a facial mask follow these steps :-
Use a cleanser ( Lotion or milk cleansers for dry skin & Gel cleansers for oily skin) to remove the dirt.
Then exfoliate with a mild scrub that contains exfoliates that are round and non-abrasive.
And then apply a facial mask that suits your skin after exfoliating.

Face Packs for Dry Skin

Note for Dry Skin: - Always wash your face with lukewarm water; do not wash with hot or cold water. While making face packs do not add water as an ingredient, you can add rosewater instead of water. Do not use soap to clean the mask.

Banana facial Mask- Mash 1/2 banana and add 1 tablespoon honey and 2 tablespoons sour cream. Apply to face and let set for about 10 minutes. Gently wipe off with a damp wash cloth or wash it off with lukewarm water.

Papaya facial Mask-Take a slice of papaya smash it well with papaya there is no need to add any other ingredient. This is the best fruit for face pack. Apply it on your face and leave it for about 15 minutes. Gently wipe off with a damp wash cloth or wash it off with lukewarm water.

Peach facial Mask- Cut a slice from a ripe peach rub it all over your face. Leave it on for 20 or more minutes and gently wipe off with a damp wash cloth or wash it off with lukewarm water. If the peaches in your supermarket are less than juice-dripping ripe, as is the case for most of the year, you can take a whole peach.

Wheat flour facial Mask- Take wheat flour, add a tablespoon of milk cream mix it well and then by adding rose water to it and to make a paste, do not add water. Apply it on your face and let it dry. Gently wipe off with a damp wash cloth or wash it off with lukewarm water.

Honey facial Mask
- Take 1½ tbsp. honey, 1 egg white, 2 tsp. glycerin, 1/3 cup flour and Whisk the honey, egg white and glycerin, and then add the flour. The result should be a thick paste. Apply to face and rinse after 15 minutes this mask effectively moisturizes and tightens the skin, making it smooth and soft.

Almond facial Mask - Soak almonds while sleeping then in the morning take off the brown skin over it and grind to a paste while making paste add rose water to it and apply on the skin, let dry. Gently wipe off with a damp wash cloth or wash it off with lukewarm water.
Face Packs for Oily skin
Note for Oily Skin: - Wash your Face with lukewarm water and then with cold water. While washing with lukewarm pores on your skin open's and you can wash off the oil present in the pores. After that you need to close the pores, so that dust does not move inside, for that wash your face with cold water. Do not use soap to clean the mask.

Apple facial Mask - Smash ½ apple and add 1 tablespoon lime juice and 2 tablespoons sour cream. Apply to face and let set for about 10 minutes. Gently wipe off with lukewarm water and then with cold water.

Tomato facial Mask -without using water add tomato juice to 1/3 cup flour and mix it well. Apply to face and let set for about 10 minutes. Gently wipe off with lukewarm water and then with cold water.

Potato facial Mask - Take a tablespoon of potato juice to it add a tablespoon of multani mitti mix both well and apply it to your face. Let it dry and gently wipe off with lukewarm water and then with cold water.

Egg White facial Mask - Take egg white and apply it on your face, do not beat the egg. Let it dry and gently wipe off with damp cotton balls or wash it off with lukewarm water and then with cold water.

Mint facial Mask - Take mint juice from mint leaves, mix the juice with rose water and let it dry. Gently wipe off with lukewarm water and then with cold water.

Cucumber facial Mask - Take a tablespoon of cucumber juice and equal quantity of mint juice. Mix both well and apply on your face. Let it for dry and then rinse off with lukewarm water and then with cold water.
Face Packs for Wrinkle skin
Note for Dry Skin: - Always wash your face with lukewarm water; do not wash with hot or cold water. While making face packs do not add water as an ingredient, you can add rosewater instead of water. Do not use soap to clean the mask.

Almond facial Mask- Take around 4 to 5 almonds and grind it well do not add water. Blend the almond power together with 1 tablespoon honey and 1 egg white. Apply to face and wash after15 minutes. Gently wipe off with a damp wash cloth. This is best for wrinkle skin.

Onion face Mask-: Though onion has harsh smell it is good for reducing wrinkles in your skin. Take a tablespoon of onion juice and mix with half tablespoon of honey. Apply on face and neck, let dry and gently wipe off with a damp wash cloth.

Banana facial Mask- Mash a ripe banana and add a table spoon of rose water. Apply on face and neck, let dry and gently wipe off with a damp wash cloth. For best results apply mask twice in a week.